HOW TO DRAIN YOUR WATER HEATERDid you know that most water heaters have a lifespan of only 10-13 years?
Many people do not consider replacing the water heater at home, but if they are not treated, it can cause many problems. Rather than waiting too late, learn how to keep the water heater in good condition to avoid additional bills. Read on to use these helpful tips to find out how to drain the water heater yourself. One of the most Common signs that the water heater needs to be emptied is that the hot water is running out faster than normal. If the build-up is excessive, the heating element in the storage tank may burn. Orange rusty water is another sign that cannot be ignored. This happens when the anode rod is damaged. Unfortunately, the material in the water heater tank will eventually wear out. The important thing red light should pay attention to the leak in the fuel tank. If you find that your water heater is leaking, the water tank can be damaged due to the accumulation of sediment. Over time, the sediment will decompose and oxidize the material in the tank. How to drain the water heater and why
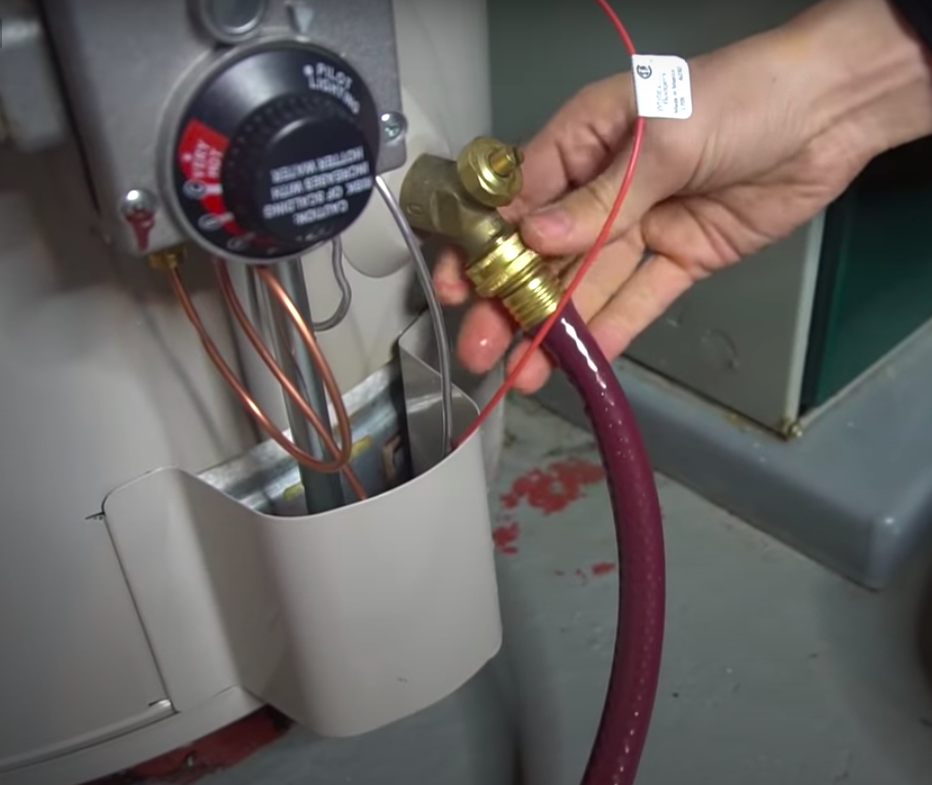
It doesn't matter if you are living in Las Vegas or Henderson NV on a hot summer day, eventually you will want hot water, and when you do would want to know that your water heater is working properly. Learning how to drain your water heater is a useful skill to know how to do yourself and can actually save you a sizable amount of money down the road. Draining and flushing your water heater once a year makes it more efficient and ultimately increases its lifespan. Also, when plumbers provide maintenance services there will be times when empty tanks will be required. It would make everyone's life easier if the tanks drain easily because of regular annual draining and flushing. Most pipes require expert experience, but anyone can drain the water heater. Most homeowners should not repair or replace the water heater, because professional plumbers must repair the pipes. But DIY water heater drain? No problem! STEP-BY-STEP (SUMMARIZED) 1. Source the Necessary tools for Proper Drainage Items in the water heater should be disposed of in the home, taking care not to spill water at the bottom of the home or near nearby buildings. You need a hose long enough to reach the water heater chute comfortably. If multiple hoses are required to safely reposition the water, tighten the connection to prevent leakage. It is recommended but does not require a wrench to tighten the hose and clean the water with a towel. 2. Prepare water heater Turn off the water tank/recirculation pump - usually at the top of the tank. Then find the switch box in your Las Vegas home and open it. Even if you can't reliably determine the water heater breaker, don't be afraid to turn off the entire breaker. No danger of electric shock. If you have a gas water heater, shut off the pilot light. Next, you will want to turn the water off. 3. Empty the water tank. Pull the hose out, then place it in the weir, open the hot water valve on the nearby sink, and open the drain valve on the water heater. It doesn't take time to drain, so watch the water heater installation carefully throughout the process. If water leaks, close the drain valve immediately until the leak is blocked. |
DETAILED STEP-BY-STEP:
Step 1: Disconnect recirculation pump (if you do not have one, proceed to next step) Step 2: Turn gas to "pilot" setting. (for electric water heaters, simply unplug them) Step 3: Cut off or turn off the water. Step 4: Connect hose to the water heater. Step 5: Find a large bucket to collect the water draining from the hose Step 6: Open the valve on the bottom of tank to release water Step 7: Open the pressure release valve on the top of the tank to create airflow Step 8: Allow the tank to completely drain. (CAUTION: the water will be HOT!) Step 9: Close the pressure release valve Step 10: FLUSH the tank by turning the water back on and letting it run for 5-10 minutes. Step 11: Close the valve at the bottom of the tank so water can no longer drain Step 12: Disconnect your hose. Step 13: Run hot water in several faucets to release the "air pockets" from your piping Step 14: Reconnect the recirculation pump Step 15: Turn the gas from "pilot" to "on." (for electric water heaters, simply plug them in) The bottom line is that draining and flushing your water heater can be tedious but does not have to be complicated. It is one of those things that pay off big if you keep up with it. Annual draining and flushing could mean the difference between needing to replace your water heater completely or getting another 3-5 years of life from them. If you still feel uncomfortable draining and flushing your water heater yourself, feel free to give us a call and we'll happily send one of our technicians out to take care of it for you. |
License #: 0077979
Bid Limit: $50,000
Copyright © 2023
Bid Limit: $50,000
Copyright © 2023
8400 South Maryland Pkwy, Unit 1091, Las Vegas, NV 89123


