Water Heater Maintenance TipsLet's face it, replacing your water heater can be expensive. It is something most people do not plan for because water heaters typically last over 10 years, with tankless water heaters lasting closer to 20 years. While replacing your water heater is inevitable, there are things that could do be done to improve your water heater's lifespan and help you squeeze out an extra few years of usage.
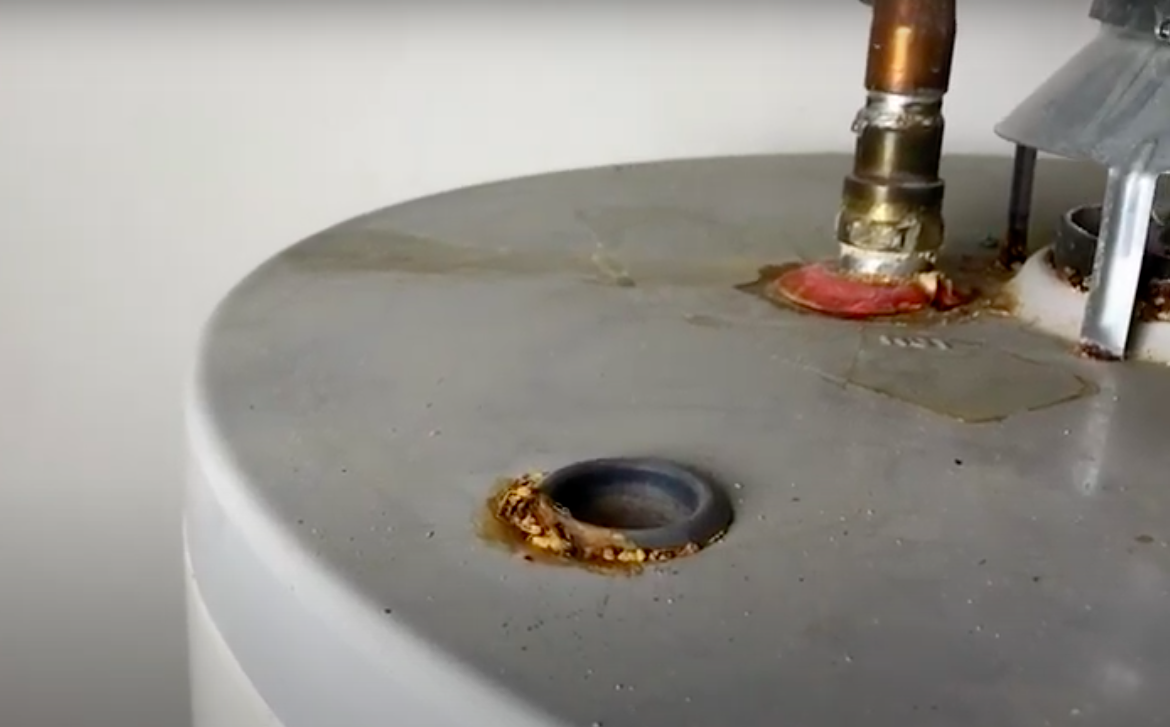
Here are 4 Water Heater Maintenance Tips to Remember: 1. KEEP THE OPTIMAL TEMPERATURE Most plumbing technicians would agree that the optimal temperature to keep your water heater at is 120 degrees fahrenheit. Most of the time, you could adjust the temperature by simply using a flat head screwdriver to adjust the dial. Keep in mind that temperatures above 120 degrees could result in more sediment and deposit formation. Should you plan on being away from home for more than 72 hours, you may also lower your water heater temperature until you return. Every 10 degrees you lower your temperature saves an average of around 5 percent in energy costs. Modern water heaters may even have a simple "vacation setting" which lowers the temperature while still keeping your pilot light on and lit. 2. FLUSH YOUR WATER HEATER TANK A healthy frequency for typical water heater usage is draining and flushing your water heater tank one to two times a year. This may sound like a daunting task but is definitely doable if you are careful. First, shut off the power source (disconnecting plug for electric water heaters, or shutting off gas valve for gas water heaters). Second, simply stop the water supply by shutting the water pipe valve. Third, connect a hose to the drain valve and open the hot handle of any faucet and safely drain the tank. After your water heater tank is fully emptied, close the drain valve and remove the hose. Then, proceed to open the cold water supply and open the hot water faucets throughout your house one at a time. Wait until water flows out from them before restoring power to the heater.Drain and repeat until clean water comes out of the hose. Close the drain cock, refill the tank, and turn its power back on. If you would rather not deal with this every year, your best bet is to consider a tankless water heater solution for your next purchase. Tankless units do not need to be drained. 3. DOUBLE-CHECK YOUR ANODE ROD Sometimes referred to as the "sacrificial" anode rod, partly due to it sacrificing itself to reduce the amount of corrosive minerals from your water heater tank. It is a long metal rod placed to attract these minerals that wear on your heater's tank. When checking your anode rod, inspect closely for any extra damage. If it is too corroded, it may be time for an anode rod replacement (beats buying a brand new water heater). Ask your plumber for assistance if unsure, as some newer water heaters have plastic lining and do not utilize an anode rod. To replace, simply insert a hose to the tank's drain cock and drain a few gallons of water, use a socket wrench to unscrew the rod. If the calcium build up is more than half an inch, it may need replacement. |
4. DOUBLE-CHECK THE TPR VALVE TPR stands for "temperature and pressure relief valve." This valve's purpose is to regulate the pressure within the water heater tank. As water heats and temperature increases, so does the pressure, which could cause the tank to crack or explode if not released. A buildup of minerals or corrosion could cause this valve to freeze, however. To check the valve, turn off your water heater's power source, and close the cold water supply valve (similar to flushing your heater). Lift the trip lever on the valve (some water may spill out). REMEMBER: If the valve does not release some water, that is NOT GOOD. The TPR should be replaced. Shut off the power and the cold-water supply valve. Next, place a bucket under the pipe connected to the TPR valve (normally on the top or side of the tank). Lift the valve and drain. |
License #: 0077979
Bid Limit: $50,000
Copyright © 2023
Bid Limit: $50,000
Copyright © 2023
8400 South Maryland Pkwy, Unit 1091, Las Vegas, NV 89123


